
This guide explains how to use the official Drift Race Blender rendering template to create sprite sheets for your custom car. The template automatically generates 64 rotation angles for the diffuse, shadow, and headlight layers, making it simple to import your car model and get it ready for the game.
Note: This guide assumes you already have a car model created in Blender. If you need help modeling a car from scratch, check out Blender tutorials on vehicle modeling first. (Use low poly modeling)
The Blender rendering template automatically produces:
The rendering template includes everything pre-configured:
The process of rendering your car involves these main steps:
Get the official Drift Race Blender rendering template
Bring your car model into the template and position it correctly
Set up diffuse, shadow, and headlight render layers
Run the automated script to generate all 64 rotation angles
Copy the rendered sprites and create car specification files
The template begins with a primitive car and headlights. You are free to modify these elements to suit your needs.
Work_Folder.
Modifying other collections may corrupt the scene setup.
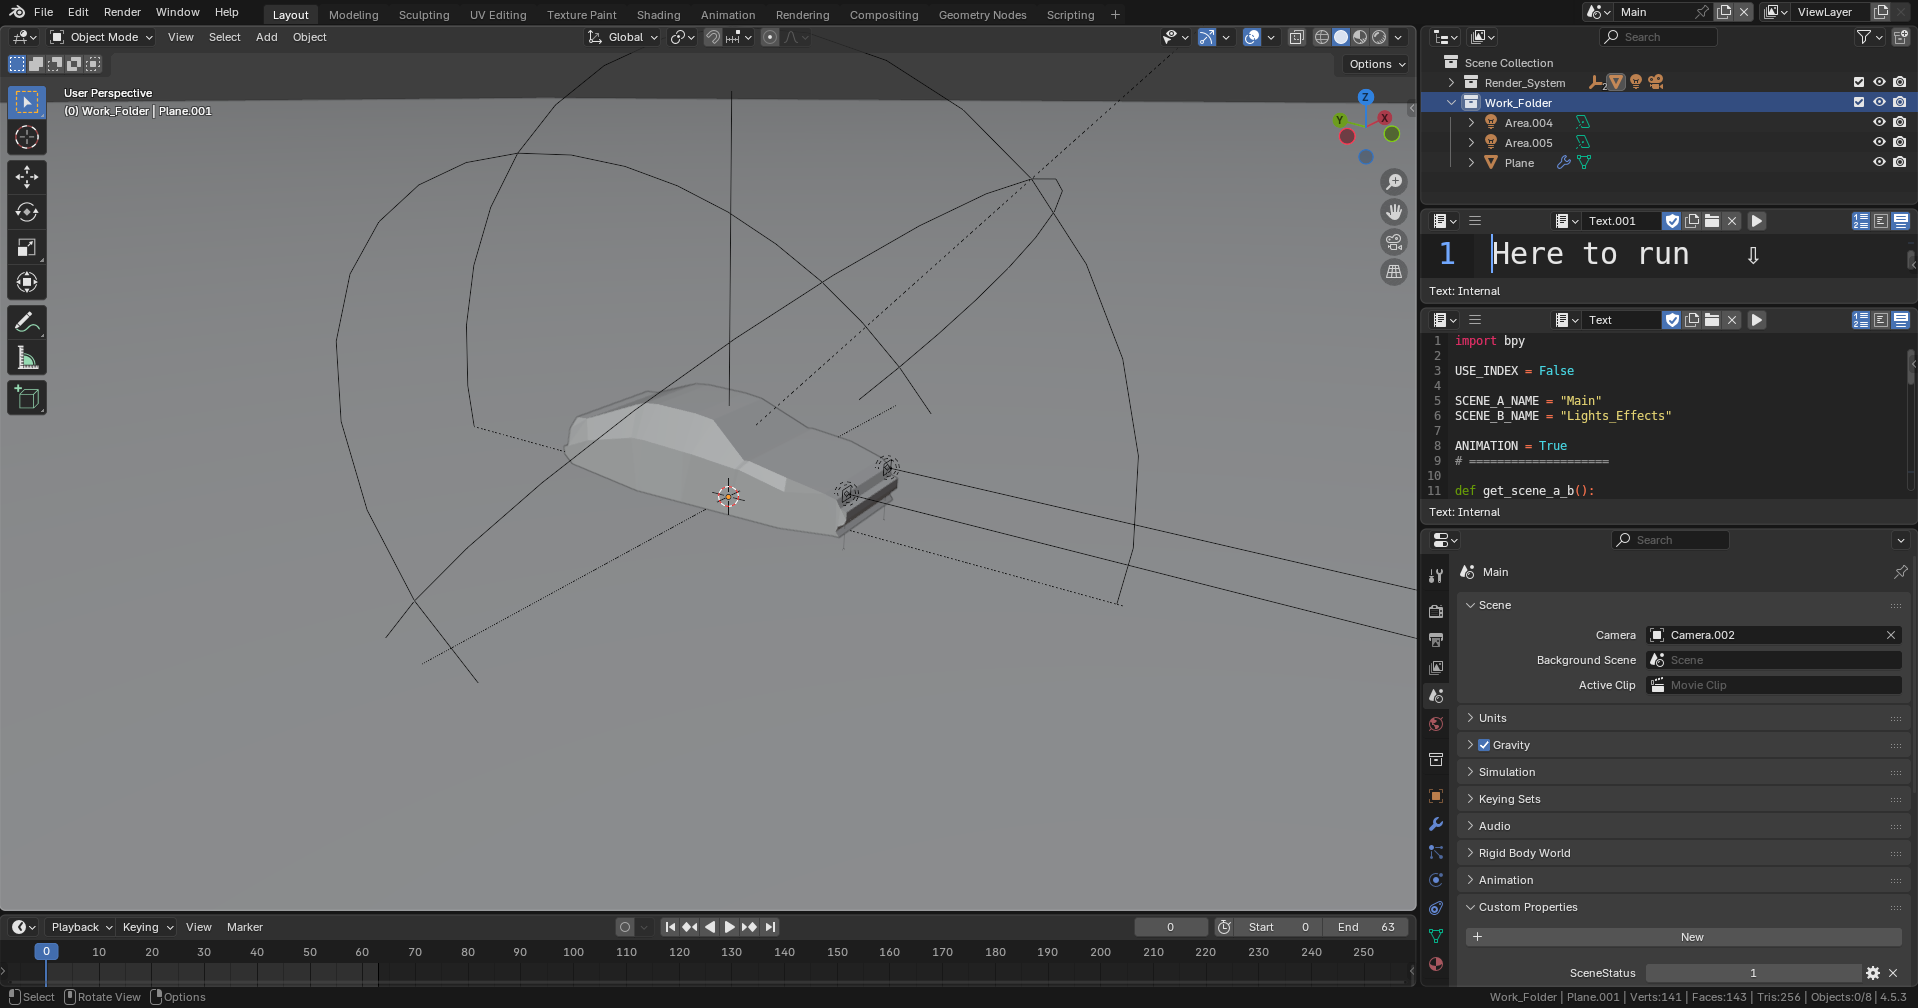
Template screen after launch
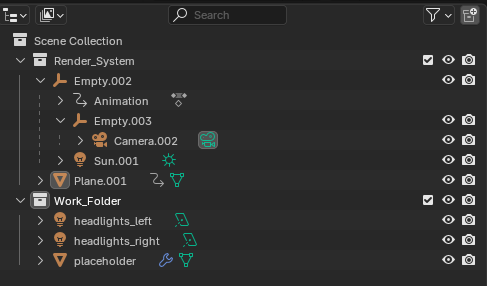
Folder structure in Outliner
First, prepare your car model for export from your working Blender file:
Import your 3D car model directly into the designated Work_Folder collection:
Work_Folder collection in the Outliner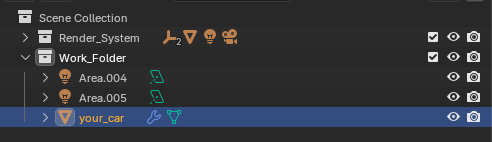
Work_Folder with your imported car element
Accurate scaling and positioning relative to the existing scene geometry (primitive car, lights) is mandatory for correct rendering:
Scaling: Adjust the size of your model to fit completely within the camera view.
Positioning: The center of your car model must be aligned with the scene's origin (0, 0, 0) and positioned correctly on the ground plane.
00
Front view - centered positioning
Side view - ground alignment
Top view - origin alignment
To start the rendering process, execute the Python script included within the Blender file:
Script screen with the Run button highlighted
Rendering Time: The script will render 64 frames × 3 layers (192 images total). This process typically takes less than 5 minutes depending on your hardware and model complexity.
The default output directory is set inside the GitHub repository's dev_assets folder.
The outputs are saved to specific subfolders:
Output folder structure with rendered sprites
For advanced users who want to implement custom animations, drivers, or special elements like popup headlights or animated components:
The scene index is stored under the Main scene custom properties (SceneStatus).
You can implement it in a driver for custom features such as:
Location of the scene index in custom properties
Example: Accessing scene index in driver
scene.get("SceneStatus", 0)
Center Your Model: Car must be centered at origin (0,0,0) for proper rotation rendering
Check Scale: Match the size of existing cars (AE86, M5) for consistent gameplay balance
Test First: Render a few frames first to verify positioning before full 64-sprite batch
Save Often: Save your .blend file before rendering to avoid losing template configurations
Material Setup: Ensure materials are properly assigned for correct layer separation
Render Time: Full 64x3 sprite rendering can take 30-60 minutes depending on complexity